
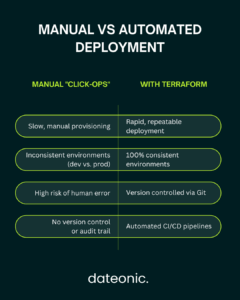
Manually clicking through the UI to deploy Databricks workspaces is slow and creates configuration drift. As your data platform scales, this „click-ops” approach becomes a critical bottleneck. The solution is Infrastructure-as-Code (IaC).
Using the official Databricks Terraform provider, you can define, version, and manage your entire environment as code. Data engineers who automate Databricks deployment with Terraform build faster CI/CD pipelines, eliminate manual errors, and ensure every environment is perfectly consistent. In this technical guide, I break down the exact steps to implement it.
Prerequisites
Before you begin, ensure you have the necessary tools and permissions. This guide assumes a high level of technical understanding.
- Technical Requirements:
- Terraform CLI (v1.0 or newer). If you don’t have it, you can find instructions on the Terraform installation page.
- A Databricks account with administrative access to create workspaces and tokens.
- Cloud provider credentials (e.g., AWS IAM roles or Azure Service Principals) with permissions to deploy resources.
- Tools Setup: The Databricks Terraform provider will be installed automatically when you run terraform init in your project directory.
- Knowledge Base: A working familiarity with Terraform’s HCL (HashiCorp Configuration Language) syntax, Databricks APIs, and basic cloud networking (VPCs/VNets) is expected.
- Security Note: For production-grade automation, always use Service Principals (Azure) or IAM Roles (AWS) for authentication. Avoid using personal access tokens (PATs) to maintain least-privilege access and eliminate security risks from long-lived credentials.
| Requirement | Type | Purpose |
|---|---|---|
| Terraform CLI | Tool | v1.0+ required to run .tf configuration files. |
| Databricks Account | Access | Admin-level permissions needed to create workspaces and tokens. |
| Cloud Provider CLI/SDK | Tool | Credentials (e.g., AWS IAM or Azure SP) to provision infrastructure. |
| HCL Knowledge | Skill | Familiarity with Terraform’s syntax is essential. |
| Databricks Auth | Security | Service Principal (recommended) or PAT for provider authentication. |
Step-by-Step Guide to Automate Databricks Deployment with Terraform
Step 1: Configure Authentication and Provider
Your first step is to declare the databricks provider in your main.tf file. This tells Terraform how to authenticate with your Databricks account or workspace.
You can configure the provider for different clouds and authentication methods. For an Azure deployment using a Service Principal, your provider block might look like this:
terraform {
required_providers {
databricks = {
source = „databricks/databricks”
version = „1.0+” # Use a specific version for production
}
}
}
# Configure the Databricks provider for Azure
provider „databricks” {
host = „https.adb-1234567890.azuredatabricks.net”
azure_workspace_resource_id = „/subscriptions/…”
azure_tenant_id = var.tenant_id
azure_client_id = var.client_id
azure_client_secret = var.client_secret
}
Best Practice: Never hardcode secrets like client_secret or tokens directly in your configuration files. Use terraform.tfvars (included in .gitignore), environment variables, or integrate with a secrets management tool like HashiCorp Vault or Azure Key Vault.
Step 2: Provision the Databricks Workspace
With authentication configured, you can now define the core Databricks workspace. While you can use the databricks_workspace resource, it’s often better to use the cloud-native resource (e.g., azurerm_databricks_workspace for Azure or aws_databricks_workspace for AWS).
This gives you full control over critical parameters like:
- Region: The cloud region where the workspace will be deployed.
- Pricing Tier: (e.g., Premium or Standard) to enable features like role-based access control.
- Networking: Specifying your own VNet/VPC for network isolation, which is a critical security requirement for enterprises.
Here is a simplified example for Azure:
resource „azurerm_databricks_workspace” „this” {
name= „dateonic-prod-workspace”
resource_group_name = azurerm_resource_group.this.name
location= azurerm_resource_group.this.location
sku= „premium”
# VNet injection for custom networking
custom_parameters {
no_public_ip= true
private_subnet_name= azurerm_subnet.private.name
private_subnet_network_security_group_association_id = azurerm_subnet_network_security_group_association.private.id
public_subnet_name= azurerm_subnet.public.name
public_subnet_network_security_group_association_id= azurerm_subnet_network_security_group_association.public.id
}
tags = {
Environment = „Production”
Owner= „DataPlatformTeam”
}
}
Always run terraform plan to preview the changes before applying them. This step is crucial for any Data Warehouse & Cloud Migration strategy, ensuring your foundation is solid.
Step 3: Deploy Clusters, Jobs, and Unity Catalog
Once the workspace exists, you can „layer” resources inside it using the databricks provider. This is where you define the compute and orchestration for your Data Science & ML Platform.
- Cluster Automation: Define a databricks_cluster resource to specify instance types, auto-scaling parameters (min/max workers), and Databricks runtime versions. You can enforce cluster policies using databricks_cluster_policy.
- Job Orchestration: Use databricks_job to configure scheduled notebook or script executions. You can link these jobs directly to a Git repository for true GitOps workflow.
- Governance with Unity Catalog: Enabling Unity Catalog is fundamental for modern data governance. You can automate the creation of the databricks_metastore, bind it to your workspace (databricks_metastore_assignment), and manage databricks_catalog, databricks_schema, and databricks_grant resources to control data access.
Terraform’s workspace feature (not to be confused with Databricks workspaces) or a directory-based structure allows you to manage multiple environments (dev/staging/prod) with variable overrides, ensuring configuration is reusable.
Step 4: Integrate CI/CD for Continuous Deployment
The ultimate goal is to automate Databricks deployment with Terraform in a CI/CD pipeline.
Using tools like GitHub Actions or Azure DevOps, you can create a workflow that triggers on pull requests. A typical workflow involves:
- Init: terraform init -backend-config=…
- Validate: terraform validate
- Plan: terraform plan -out=tfplan
- Approval Gate: A manual review step to check the plan’s output.
- Apply: terraform apply „tfplan”
This process ensures that every change to your data platform is peer-reviewed, tested, and applied automatically. The idempotency of Terraform guarantees that it will only apply the necessary changes to reach the desired state, and terraform refresh can be used to detect any configuration drift.
Best Practices and Security Considerations
- Modularity: Don’t write all your code in one main.tf file. Organize resources into reusable modules (e.g., a module for clusters, a module for jobs, a module for workspace networking). This is a core principle for building a scalable Data & AI Platform and Lakehouse.
- State Management: Use a remote backend like an S3 bucket or Azure Blob Storage (with state locking) to store your terraform.tfstate file. This is critical for team collaboration and security.
- Compliance and Governance:
- Implement resource tags (databricks_tags) for cost allocation and auditing.
- Leverage the Databricks and underlying technologies to enforce fine-grained permissions.
- Read the official Databricks Unity Catalog documentation to understand its powerful governance model.
- Performance Tips: Optimize for cost by using spot instances for clusters (aws_attributes { spot_bid_price_percent = 100 }) and setting appropriate autotermination_minutes.
Troubleshooting Common Issues
Even in automated workflows, you may encounter issues.
- Auth Failures: Often caused by expired secrets or incorrect permissions on the Service Principal.
- Resource Conflicts: May happen if a resource was created manually in the UI. Use terraform import to bring existing resources under Terraform management.
- Provider Version Mismatches: Pin your provider versions in the terraform block to avoid breaking changes from updates.
- Debugging: Use terraform validate to check syntax and TF_LOG=DEBUG terraform apply to see detailed API-level logs. The Databricks workspace logs also provide valuable insights.
Conclusion
To automate Databricks deployment with Terraform is to adopt a modern, reliable, and scalable approach to data infrastructure. It empowers data teams by turning complex manual setups into version-controlled, automated code. As Databricks continues to evolve, IaC will remain a cornerstone for managing sophisticated AI/ML and data governance pipelines.
Ready to scale your Databricks environments and eliminate manual configuration drift? Contact Dateonic, your Databricks-certified partner, for expert consulting on advanced automation, CI/CD implementation, and data platform migrations.
Visit Dateonic to schedule a free assessment today.