
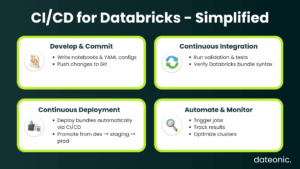
Setting up CI/CD for Databricks transforms your development lifecycle. It allows your teams to release updates faster, more reliably, and with greater confidence. The primary benefits include:
- Automation: Eliminates error-prone manual steps for deploying notebooks and jobs.
- Consistency: Ensures that every environment (dev, staging, prod) is configured identically.
- Faster Deployment: Enables rapid iteration by integrating directly with your Git repository.
In this guide, I will walk you through how to „set up CI/CD for Databricks” using the modern, preferred standard: Databricks Asset Bundles (DABs). We’ll use tools like the Databricks CLI, Git, and CI/CD platforms such as Azure DevOps or GitHub Actions to build a robust, production-ready pipeline.
Prerequisites for Setting Up CI/CD for Databricks
Before you write any code, you need to configure your foundational accounts and tools.
- Databricks Workspace: You need an active Databricks workspace. A Premium-tier plan is recommended to use service principals for production CI/CD.
- Git Repository: Your project must be hosted in a Git provider like GitHub, GitLab, or Azure Repos.
- CI/CD Tool Access: You need permissions to create and manage pipelines in your chosen platform (e.g., Azure DevOps or GitHub Actions).
The most critical tool is the Databricks CLI (version 0.218.0 or newer), as it includes the necessary „bundle” commands. You must also configure authentication. While OAuth is great for local development, your automated CI/CD pipelines must use a service principal for secure, headless authentication.
Finally, define your deployment targets (dev, staging, prod) within your Databricks workspace to ensure environment isolation.
# Install the Databricks CLI (example for Homebrew)
brew install databricks/tap/databricks-cli
# Verify your version
databricks -v
# Output: Databricks CLI v0.218.0 or higher
# Configure local (OAuth) authentication
databricks auth login –host https://<your-workspace>.databricks.net
# For CI/CD, you will configure service principal auth using environment variables
# (DATABRICKS_HOST, DATABRICKS_CLIENT_ID, DATABRICKS_CLIENT_SECRET)
| Component | Requirement | Example / Command | Purpose |
|---|---|---|---|
| Databricks Workspace | Premium Tier (recommended) | https://<workspace>.databricks.net | Enables service principal auth |
| Databricks CLI | Version ≥ 0.218.0 | databricks -v | Supports bundle commands |
| Git Repository | GitHub, GitLab, or Azure Repos | git init | Version control for code and configs |
| CI/CD Tool | Azure DevOps or GitHub Actions | — | Automate deployment pipeline |
| Authentication | Service Principal | Environment variables | Secure, headless deployment |
Understanding Databricks Asset Bundles (DABs) for CI/CD
Databricks Asset Bundles (DABs) are the core of modern Databricks CI/CD. A DAB is a collection of source files and metadata, defined in a databricks.yml file, that describes your entire Databricks project as code. This includes jobs, notebooks, Delta Live Tables pipelines, and even permissions.
DABs align perfectly with DevOps best practices, enabling true Infrastructure as Code (IaC) for your data platform. Instead of „clicking around” the UI to create a job, you define it in a YAML file that lives alongside your business logic.
This approach brings several key benefits to your CI/CD workflow:
- End-to-End Deployment: Bundles manage the entire project lifecycle, from development to deployment.
- Version Control: All data assets, code, infrastructure, and configuration, are stored and versioned in Git.
- Collaboration and Compliance: Changes are reviewed and approved via pull requests, creating a clear audit trail.
This YAML file defines the bundle, maps files to Databricks, and defines a job that uses a notebook.
# databricks.yml
bundle:
name: „my_data_project”
# Define your development, staging, and prod targets
targets:
dev:
mode: development
default: true
workspace:
host: https://<dev-workspace>.databricks.net
prod:
mode: production
workspace:
host: https://<prod-workspace>.databricks.net
# Use service principal auth for prod
run_as:
service_principal_name: „<sp-application-id>”
# Define the resources to be deployed
resources:
jobs:
my_dlt_job:
name: „My DLT Pipeline Job”
tasks:
– task_key: „run_pipeline”
pipeline_task:
pipeline_id: ${resources.pipelines.my_dlt_pipeline.id}
pipelines:
my_dlt_pipeline:
name: „My DLT Pipeline”
storage: „/test/storage”
libraries:
– notebook:
path: „./src/my_dlt_notebook.py”
Step-by-Step Guide to Set Up CI/CD Pipelines for Databricks
Here is the hands-on process for building your automated pipeline.
Step 1: Initialize and Configure a DAB Project
Use the Databricks CLI to initialize a new bundle project from a template. This creates the databricks.yml file and a basic directory structure.
# Initialize a new bundle from the default template
databricks bundle init
# This will prompt you for a project name and create the folder structure
After initialization, define your resources (jobs, pipelines, etc.) in the databricks.yml file, as shown in the example above.
Step 2: Version Control with Git
Commit your bundle files to your Git repository. This is the „CI” part of CI/CD. All changes to your Databricks jobs and code should now be initiated by a Git commit and reviewed through a pull request (PR). A common branching strategy is to have a main branch for production and feature branches for development.
git add .
git commit -m „Initial commit for Databricks bundle”
git push origin main
Step 3: Integrate with CI/CD Tools
This is where you automate the deployment. You will create a pipeline YAML file in your repository that instructs your CI/CD tool (GitHub Actions, Azure DevOps) what to do when code is pushed. The pipeline will install the Databricks CLI, authenticate using the service principal, and deploy the bundle.
This workflow triggers on a push to the main branch, validates the bundle, and deploys it to the prod target.
name: Deploy Databricks Bundle
on:
push:
branches:
– main
jobs:
deploy:
runs-on: ubuntu-latest
steps:
– name: Checkout code
uses: actions/checkout@v3
– name: Setup Databricks CLI
run: |
curl -fsSL https://raw.githubusercontent.com/databricks/setup-cli/main/install.sh | sh
– name: Validate Bundle
run: databricks bundle validate
env:
# Auth via service principal secrets stored in GitHub
DATABRICKS_HOST: ${{ secrets.DATABRICKS_HOST_PROD }}
DATABRICKS_CLIENT_ID: ${{ secrets.DATABRICKS_CLIENT_ID_PROD }}
DATABRICKS_CLIENT_SECRET: ${{ secrets.DATABRICKS_CLIENT_SECRET_PROD }}
– name: Deploy Bundle to Prod
run: databricks bundle deploy -t prod
env:
DATABRICKS_HOST: ${{ secrets.DATABRICKS_HOST_PROD }}
DATABRICKS_CLIENT_ID: ${{ secrets.DATABRICKS_CLIENT_ID_PROD }}
DATABRICKS_CLIENT_SECRET: ${{ secrets.DATABRICKS_CLIENT_SECRET_PROD }}
Step 4: Testing and Deployment
Your CI/CD pipeline should include automated testing. Before deploying, you can run unit tests (e.g., using pytest) on your notebook logic. The databricks bundle validate command checks your YAML syntax, but it’s also crucial to run integration tests.
The final pipeline step, databricks bundle deploy, pushes your defined assets to the Databricks workspace. You can also trigger jobs to run immediately using databricks bundle run <job_name>. For more details on these commands, refer to the official Databricks CLI documentation.
Best Practices for CI/CD on Databricks
Simply setting up a pipeline isn’t the end goal. To truly benefit from DevOps on Databricks, follow these best practices.
- Security First: Always use service principals or OAuth token federation for automation. Never hardcode API keys in your pipeline scripts. Store credentials securely in your CI/CD tool’s secrets manager.
- Isolate Environments: Your dev, staging, and prod targets should be completely separate, ideally in different workspaces, to prevent accidental data corruption or downtime.
- Automate Everything: Avoid all manual deployments to production. Every change, even a minor configuration tweak, must go through a Git pull request and your CI/CD pipeline.
- Manage Dependencies: Define your project’s Python and JAR dependencies within the bundle configuration to ensure all environments are identical.
- Optimize for Cost: Configure your jobs to use cost-effective job clusters instead of all-purpose clusters. This is a key part of Databricks Optimization.
This CI/CD framework is also the foundational component for building a mature MLOps practice, enabling you to version, test, and deploy machine learning models as part of your automated workflow. You can learn more about this in our article on Unlocking MLOps on Databricks.
Conclusion
Setting up CI/CD for Databricks using Databricks Asset Bundles (DABs) is a critical step toward building a reliable, scalable, and efficient data platform. This hands-on, code-first approach provides the foundation for robust DevOps, enabling your team to innovate faster and with more confidence.
This guide provides the blueprint, but every organization’s needs are unique. For tailored implementation, optimization, and guidance on migrating to Databricks, contact Dateonic, your Databricks consulting partner.