
Is your Databricks bill surprisingly high? Are your data pipelines running slower than you’d like? The problem often isn’t your code, but your cluster setup. In Databricks, default settings are rarely efficient and can easily become your largest unnecessary cloud expense.
In this guide, I move past the defaults, providing the essential Databricks cluster configuration best practices. We’ll focus on practical tips for instance types, auto-scaling, and termination policies to help you unlock significant cost savings and better performance.
Understanding Databricks Cluster Types
The first step in optimization is choosing the right tool for the job. Databricks offers different cluster types, each designed for a specific purpose.
- Job Clusters: These are transient clusters created for automated, scheduled workloads (like ETL or batch processing). They are a critical best practice for cost optimization as they terminate automatically when the job completes, ensuring you only pay for the compute you use.
- All-Purpose Clusters: These are designed for interactive analysis, collaborative data science, and development. They are typically shared by multiple users and remain active until manually terminated or an auto-termination policy kicks in.
- SQL Warehouses: These are compute resources specifically optimized for BI and SQL analytics workloads, offering high-speed query performance for tools connecting to Databricks.
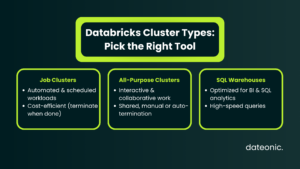
For workloads that require frequent cluster restarts, using Pools is a highly effective strategy. Pools maintain a set of idle, „ready-to-use” instances, which can dramatically reduce cluster startup times.
Choosing the Right Instance Types
Selecting the correct virtual machine (VM) instance type for your driver and worker nodes is essential. Your choice should be based on the specific needs of your workload, such as CPU, memory, or storage requirements.
| Instance Type | Workload Suitability | Example Use Case | Cost Tip |
|---|---|---|---|
| General Purpose | Balanced tasks & dev | Initial development, small ETL | Start small, scale if needed |
| Memory Optimized | RAM-heavy tasks | ML, large datasets | Use for memory-intensive jobs |
| Storage Optimized | High I/O & caching | Delta Lake-heavy pipelines | Avoid overprovisioning |
| Compute Optimized | CPU-heavy ETL & transformations | Batch pipelines | Test workload before scaling |
| GPU Optimized | Deep learning & model training | ML/DL jobs | Only for GPU-accelerated jobs |
Matching instance types to your workload is a core pillar of cost-effective design.
- General Purpose: Good for a balance of tasks and initial development.
- Memory Optimized: Ideal for RAM-intensive jobs, such as those involving large datasets in memory or machine learning. Dateonic recommends instances like the R5 series on AWS for ML.
- Storage Optimized: Best for workloads that benefit from Delta table caching or require fast local storage.
- Compute Optimized: The right choice for CPU-heavy tasks like complex ETL pipelines. Dateonic suggests instances like the AWS C5 series for these jobs.
- GPU Optimized: Specifically for deep learning and ML model training that can leverage GPU hardware.
For cost savings, don’t overprovision. Use lower-spec instances for basic ETL and testing. As a best practice, always test your configurations against your specific jobs to find the optimal balance.
Implementing Auto-Scaling for Efficiency
Auto-scaling is your most powerful tool for managing variable workloads and controlling costs. It allows a cluster to dynamically add or remove worker nodes based on demand.
The benefits are straightforward: you avoid paying for idle resources during quiet periods and automatically get the power you need during processing peaks.
- Configuration: Always set a minimum and a maximum number of workers. A common configuration might be a minimum of 2-4 workers, scaling up to 20 or more for peak loads.
- When to Use: Auto-scaling is perfect for analytical and batch ETL jobs with fluctuating demands.
- When to Avoid: Be cautious using auto-scaling for certain ML training jobs, as scaling down nodes can lead to the loss of the data cache, potentially impacting performance.
Balancing instance size with auto-scaling is key. Using fewer, larger nodes can sometimes reduce data shuffling, but too few nodes can limit parallelism. Always monitor your jobs to ensure you aren’t over-scaling.
Setting Effective Termination Policies
An idle cluster is a costly one. Auto-termination is a simple, mandatory feature for preventing unnecessary compute costs from clusters left running by mistake. This feature automatically shuts down a cluster after a specified period of inactivity.
- All-Purpose Clusters: For interactive development, you might set a higher timeout, such as 90 or 120 minutes, to avoid frustrating developers.
- SQL Warehouses & Ad-Hoc Clusters: For query-focused clusters, a much lower timeout is recommended. Dateonic’s best practice is often between 15-30 minutes of inactivity. For some SQL warehouses, even 10 minutes is appropriate.
This policy should be enabled for all non-critical workloads. The most effective strategy is to combine auto-termination with cluster policies to enforce these rules across all teams in your organization, ensuring governance and cost control.
Additional Optimization Strategies for Performance and Cost
Beyond the core configurations, several other strategies can give you a performance and cost edge.
- Enable Photon: Always use the Photon acceleration engine where available. It provides a significant performance boost for SQL and DataFrame operations, making your queries run faster, which in turn reduces compute time and cost.
- Use Spot Instances: For non-critical workloads like development or testing, configuring your workers to use spot instances can yield massive savings of up to 90% on compute costs. For stability, pair spot workers with an on-demand driver node.
- Apply Tags: Implement a consistent tagging strategy for all clusters. This is essential for cost governance, monitoring, and allocating expenses to the correct teams or projects.
- Leverage Delta Lake: Using Delta Lake is fundamental. Its features, like data skipping and caching, dramatically reduce the amount of data that needs to be scanned, speeding up queries. For more advanced performance, explore Delta Lake optimizations like Z-Ordering and Liquid Clustering.
- Choose Access Modes: Select the correct cluster access mode (Single User, Shared) based on your security and collaboration needs, especially when using Unity Catalog.
For more in-depth guidance, see the official Databricks documentation on compute configuration and Enhanced Autoscaling. Understanding the pricing breakdown of different cluster types can also inform your strategy.
Conclusion
Mastering Databricks cluster configuration best practices is a continuous process, not a one-time setup. The difference between an optimized environment and a default one is measured in faster insights and thousands of dollars in savings.
The key takeaways are:
- Match the Cluster to the Workload: Use Job Clusters for automation and All-Purpose Clusters for interactive work.
- Right-Size Your Instances: Don’t pay for compute you don’t need.
- Always Enable Auto-Scaling & Auto-Termination: These are your primary automated cost-control mechanisms.
Always test and monitor your configurations against your real-world data and use cases. What works for one job may not be optimal for another. For help navigating your setup, see our guide to getting started with your first cluster.
Ready to build an efficient, scalable, and cost-effective data platform? For tailored Databricks cluster optimization and expert consulting on everything from Medallion Architecture to platform governance, visit Dateonic to see how we can help.